Replicator 2 Extruder Alternative: Some Spring In Your Step
5 stars based on
67 reviews
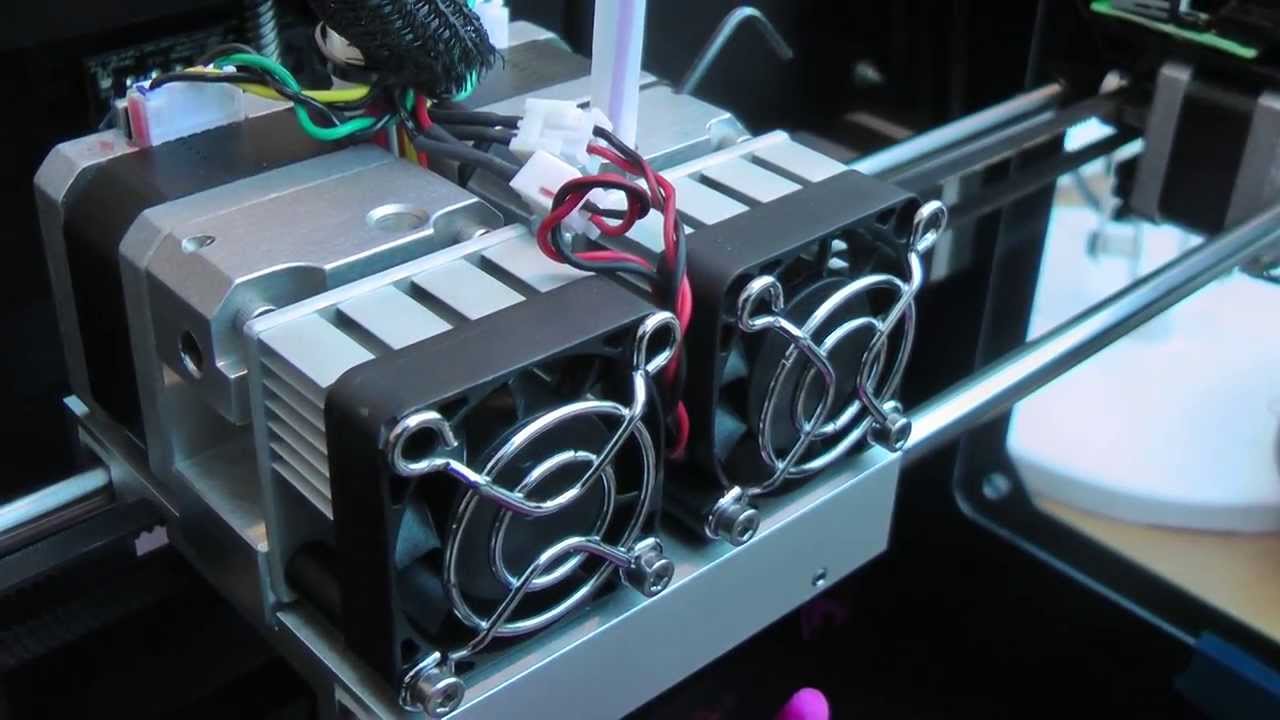
If you print this Thing and display it in public proudly give attribution by printing and displaying this tag. Replicator 1 Replicator 2 Replicator 2X More information can be found at www. Here are some of the features: This force applied is easily adjustable without the need to replace parts or disassemble anything. No more need to file the shaft yourself possibly damaging the stepper motor with metal filings in the bearing. See where these extruders are now: This upgrade began development in April Here are some videos showing the upgrade in action while still in the prototype stage.
The printable parts can be sliced with the latest Makerware using the following settings: Check out the full instructions on how to install it here: Auto-magically prepare your 3D models for 3D printing. A cloud based 3D models Preparing and Healing solution for 3D Printing, MakePrintable provides features for model makerbot replicator 1 extruder upgrade, wall thickness Please Login to Comment.
I purchased these from you a couple years ago, when using my now dead Makerbot Replicator 1 - Dual Extruder. Only mod that actually helped that P. I have since modded my Wanhao i3 Duplicator that I got a little over makerbot replicator 1 extruder upgrade year ago with one of them.
This is the best extruder used so far. I have recently noticed a change in the manufacturing quality of makerbot replicator 1 extruder upgrade pins sourced from overseas. To compensate for makerbot replicator 1 extruder upgrade, I have modified the bearing holders to be more forgiving with respect to dowel pin radii variance.
I just bought and installed the purchased aluminum version for both extruders on a Wanhao duplicator 4S. Also upgrded to the Micro Swiss All Metal hot end. I had to adapt and print a guide for flexible filaments. The system is working flawlessly. Haven't had to tear appart the head to declog filaments since the upgrade. Accuracy and thermal stability are improved as well. Thanks to DHeadrick for the design and implementation as well as support beforehand.
Why not include a flexible filament guide as an integrated part of the aluminum part or as a separate aluminum part? I realize it would reduce visibility to the filament for unclogging but the add-on 3D printed part does that anyway.
The upgrade is well worth it! I do offer a filament guide it's one of the models above which can be downloaded and printed. If a non-plastic version is needed, it can be ordered in bronze from Shapeways www.
I recommend printing one to test it fits with your printer before ordering in bronze. It was just brought to my attention that there is no spacer bar included in the files available for download. If you have printed out the parts and noticed that the filament path does not line up Where it is located in the assembly can be found on page 3 of the installation manual http: I just added a printable tool for the hex key included in the kit.
It may also prevent the tiny set screw from getting lost during spring swapping. I just uploaded a jig to aid people having difficulty removing the gear wheel from the stepper motor shaft.
You also need a 10 nut and bolt as well as a zip-tie. About the filament guides, I read in the google group: This will allow drilling it to make it smoother. Can you please update the instructions with this. Would help getting ninja flex prints to actually work: I've updated all the makerbot replicator 1 extruder upgrade to shrink the guide hole to 1.
Printing these parts with at least 3 shells will leave enough material in the wall to allow a drill to be used to bore it out and give a smooth wall for soft filament.
I will add this information to the manual. I just notice that the guides I had uploaded were not oriented correctly. I replaced them so makerbot replicator 1 extruder upgrade are oriented by default so that they do not require supports. First of all, makerbot replicator 1 extruder upgrade for the great design work DHeadrick! I just bought my Ninja-flex filament and can't get it to load using my using my 3FPD extruder upgrade another great design though.
Would this work well printed in Nylon ? I going to give it try but wanted to know your makerbot replicator 1 extruder upgrade on the matter. Thank You very much! Hope to buy the Aluminum modules soon too! Give it a try Definitely print out the guides to support the filament between the pinch wheel and the entrance to the thermal barrier tube.
Also, adjust the spring force so that it grips the filament well but doesn't flatten it. If the filament gets squished into an oval, it won't fit down the pathway and will jam.
So it looks like I have my work cut out for me to run some makerbot replicator 1 extruder upgrade Perhaps the Aluminum upgrade is the most robust? My comments above still stand Thanks again for the great work here! The beautifuly machined compact design is easy to remove disassemble and service. Tension adjustment is a snap as well as super quick filament swaps with the "de-tensioner" feature.
I have the aluminum carriage and the stepper required a 0. I have 0 feed issues. This is how it should have been done in the 1st place. Now how about some aluminum gantry parts.
This gives more time for the layers to cool before the heated nozzle returns to an area. I re-oriented the STL files so that they can be opened and printed without the need to place them on the build surface correctly. I also added the filament guides which are required for flexible filaments such as Ninjaflex. Can't see the pictures you extruder inside? I want to get more information to optimize my extruder. That is makerbot replicator 1 extruder upgrade of the design process which I don't want copied.
If you want to know more, all I can suggest is that you download and print the STL files as well as the manual which explains what hardware is required and where. I have a same aluminium alloy extrusion machine lv block production now have need can contact me. Your extruder upgrade is nothing like this one. I'm not sure what you want to contact me about? I've noticed you're commenting on many extruder upgrade pages.
You can download a complete hardware list here if you wish to source parts yourself: The hardware list is in the zip of downloadable files along with the manual. I just put in an order for 2 hardware modules. If you can do expedited shipping, that would be great I have a demonstration to do on Thursday this week at makerbot replicator 1 extruder upgrade local children's museum. I'll print one out in ABS, while I wait for your stock to catch back up. If I can fix it long enough to print in ABS, then I can run for makerbot replicator 1 extruder upgrade while as I wait for the aluminum parts to be available.
I like on the Rep 1 the offset to use the flat on the motor arm. And it looks great, which is always nice. One thing is weird to me, though - having to stick a tool in to push the bearing back, rather than having a lever always in place as the other extruders do.
I use this often - I swap filament often to change materials, etc. Why not a lever? In the interest of making the part as sleek and compact as possible, a handle was not used. A handle would also require much more machining and material waste to make it economically feasible. I will keep investigating the possibility of how to add one in the future no promises though: You could print out the STL versions and see.
The hardware kit for the Replicator 1 includes 50mm long bolts. You could verify if these would be long enough for the QU-BD. Say thanks by giving DHeadrick a tip and help them continue to share amazing Things with the Thingiverse community.
We're makerbot replicator 1 extruder upgrade DHeadrick would love to see what you've printed. Please document your makerbot replicator 1 extruder upgrade and share a Make with the community.