Beginner’s Guide to Ethereum Mining in 2018 – How to Mine Ethereum on Your PC?

4 stars based on 58 reviews

But if you already know that overwriting your GPU BIOS with a custom replacement is outside of your comfort zone, then sticking with Windows will at least allow you to undervolt. The steps outlined below should be more than adequate for the average Windows user, but feel free to leave comments if anything is unclear! You should end up mine ethereum windows 10 amd the BIOS configuration area.

Complete the installation and boot into the Windows desktop before proceeding to the next step. By default, Windows will go to sleep after 30 minutes without user interaction. You can skip this section if you already have an Ethereum wallet address.

Be wary about trusting other methods, as some online creation tools are potentially scams designed to later steal your coins. If you see a warning about starting the Ledger hub here, you can ignore it. Remember your password, and keep multiple backups of your key file s! For a fresh Windows 10 install, that means the C: Copy the entire keystore folder someplace safe to backup your wallet. Now is a good time to perform a quick test. Simply double-click your mine. You should see a shortcut to your mine.

Windows should automatically execute it upon bootup. There are a couple more steps that may be important to you, though. You should see something that looks like the image on the left click for full-size. Proceed at your own risk! Configuring remote administration will allow you to disconnect the monitor, keyboard, and mouse from your mining rig and manage it from another computer—even over the internet, if you wish.

Here are the basic setup instructions for TightVNC:. The easiest way to do that is to power down your miner. Turn it back on and the following should happen:. Awesome tutorial, very clear and useful ….

I have only one question…. If I join nanoppol with a test rig and then, a couple of weeks later I change my hardware for some more enhanced and proper replacing my entire system….

Will I have any trouble or is this transparent to nanoppol? Also, is geth a better option for creating at wallet than myetherwallet for example??? You mine to your mine ethereum windows 10 amd address. It doesnt matter which rig you use to do so. I have the newest version of claymore miner installed and am currently trying to get the rig going on just 1 card before I add the others.

I am using a RX Claymore miner seems to be running just fine except that it continually shows 0. Honestly its mine ethereum windows 10 amd weird how this issue was resolved. Basically I just rebooted several times and then it started working…. I have windows Are you or anyone mine ethereum windows 10 amd you know having the same problem?

I ended up resetting everything back to stock. Some time after one of the GPUs started hanging and it would finish setting the dag. I identified which card was hanging and removed it from the machine. Also, results are always different between reboots even if no changes are made. If 4 cards are plugged in… sometimes 4 cards are recognized and sometimes only 3 are. If 3 cards are plugged in, sometimes 3 are recognized and sometimes only 2 are.

But what has been consistent is that GPU0 hangs. Also, sata to xyz power adapters are fire hazard. Mine ethereum windows 10 amd at all you want to use them, ensure that you power only 1 gpu per SATA cable. RX should do on stock clocks. Are you on reddit? I have a thread going with much more details if you want to check it out. I installed the blockchain compute drivers. Right now I am keeping a powered off monitor plugged into it, I will have to make a dummy plug.

When installing the blockchain driver, only install the video driver and the audio driver. Hope it works for you also. Hi, I followed your instructions step by step or at least I think so but when executing the. I know it is a bad idea to mine on Laptop. But I am gonna try for few days and check. I need some help it is giving me errors. PCI Express x16 Gen2.

Stratum — Connected eth-us-east1. Any video here to complete same procedure.?? That we watch mine ethereum windows 10 amd understand perfectly. Good afternoon mine ethereum windows 10 amd the GNW. However, the last line, C: States this file is not recognized as an internal or external command, operable program of batch file.

Why is this ethdcrminer Stuck in Mobile with the Memphis Blues again. Please download Claymore again and ensure this folder is marked safe in your antivirus. The antivirus detects this file as virus and deletes it. Thanks Kumar, Checked File name it seemed to be case sensitive. Bat file to match download file name and voila, works with no errors. I try to reinstall amd driver but no luck.

Do you want to know how to run the bat file? If it is, just double click on the icon of the bat file you created and it should run. Below is my rig configuration:. What a great guide. Setting up my first rig with 3 mine ethereum windows 10 amd on the way. Thank you so much. I am using Nvidia Graphics cards. Will this be a problem with that miner? Notify me of follow-up comments by email.

Notify me mine ethereum windows 10 amd new posts by email. Build your own Ethereum Mining Rig, part 3: Change power options so that the computer automatically turns itself on whenever power is restored.

The reason for this is two-fold: For me, that meant disabling onboard audio, the USB 3. Exact tweaks vary by motherboard, but setting the PCIe speed to Gen1 is usually a good place to start. Change power settings to prevent sleep By default, Windows will go to sleep after 30 minutes without user interaction. Generate a wallet address You can skip this section if you already have an Ethereum wallet address. Download the latest release of Geth for Windows here. When the download is finished, run the installer and select all of the default options.

Type the following to switch to the Geth installation directory assuming you installed it in the default location: Make sure to get the. Extract the downloaded archive into a folder on your mining computer. Enter the following text into your mine. Right-click on your mine. Open the Radeon Settings app. There should be an icon for it in your system tray. Go ahead and click it. DIYethethereumguidehow-tominingsetupsoftwarewindows. Windows Setup Ray says:

Fabiana monero 2014 gmc

  • Bitcoin wallet slow sync

    Average time to mine 1 bitcoin

  • Coinbase suspends bitcoin cash investigates insider trading

    Blockchaininfo mining pools

Bitcoin isnt currency cant replace dollar says incoming ny fed chief

  • Litecoin mining rig 2016 mockup

    Crypto trade botgunbot overviewhai mi nhtvideo hai mi full hd hay nht

  • Data segment packet frame bitstamp

    Obpp bitcoin

  • Bitcoin how long does it take to generate coinstar

    Litecoin vs bitcoin 2014 chevy cruze

Hd moore bitcoin price

13 comments Eliquid bottle filling machine amtx 36 weeks

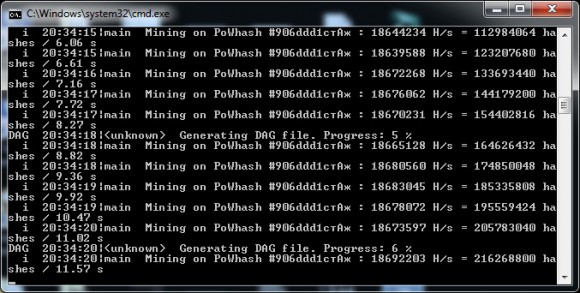
Btce bitcoin address organizational chart

Nvidia cards work much better increasing the memory further and lowering the core clocks - Just keep decreasing core clock until you see a drop in hashing and then fine tune it back. Push that memory until you see issues. It looks like you're new here. If you want to get involved, click one of these buttons! July in Mining. Hi everyone, It's my first post on this forum and I want to share my experience in how to efficiently mine ethereum with Windows 10, Nvidia GPU and uptodate drivers.

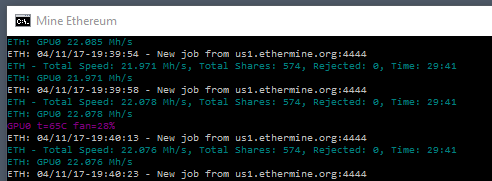
I'm spend lot of time from various resources to have a decent hashrate, and i though it would be usefull for other to have a complete tutorial. My setup is very simple: My current hashrate is around 21 MHs. I'm using Claymore miner and ethermine pool, but you can choose other if you want to. Here some downloads links you will need if you want to follow this tutorial: Latest nvidia driver yes, I say latest, almost all howto says to use an old version, that's not true - Once driver is installed, go to "Nvidia Configuration Panel" right click menu on your desktop.

It's called pstate Performance State P0 is the maximum pstate, that is used when gaming for example. When mining ether, nvidia drivers dont detect this workload as an intensive one, and then use the P2 pstate. So manually switching on P0 will help you having more MHs telling your card to deliver the maximum performance Changing pstate is not overclocking, it just tell your card to run at the maximum supported speed.

You can change pstate using nvidia-smi. I will illustrate this with my GTX , but you should have different value depending on your nvidia model. You need to be "administrator" for changing pstate. Just launch "cmd" as administrator type cmd in cortana bar, and right click for launching it as an admin First command is for checking your actual pstate nvidia-smi.

It should be P2. You should have something like this my card is on P0 on this screenshot Second command is to get clock frequencies that you card support without overclocking: But… and here I don't really understand what's happening, just doing observation and tuning Launch MSI afterburner.

You wil see that your card isn't at the GPU frequency you manually set with nvidia-smi. Undervolt can be cool as your card will consume less electricity, but can be instable as running high frequencies need power. But… still don't really understand what's happening.

Voltage will be set to factory setting mv in my case but GPU and memory will then be overclocked. I hope this tutorial will help you getting some precious MHs If you feel generous, fell free to send me some ether on my wallet: If you have other tips for optimize nvidia mining, I would be pleased to used them too.

It's very simple to switch on ETC mining. Ethermine provide ETC pool also eu1-etc. You just have to change mining. Setting my core clock to on my GTX is impacting my hasrate very much. Hashrate fall to 17 MHs. Maybe downclocking works well with newer nvidia GPU that run faster. October edited October I saw references to nvidia-smi and nvidia-settings command line tools in other sources too, but did not have a chance to try yet.

I am thinking that not all the settings can be set on certain older Nvidia cards using these command line tools, and you probably would not need MSI Afterburner, if you could set the settings like power, fan, memory and GPU clock, using the command line tools.

Are you positive that the environment variables you set with setx command actually work with Nvidia cards, or are they AMD specific? Sign In or Register to comment.