
Artifacts mining litecoin with guitars
12 comments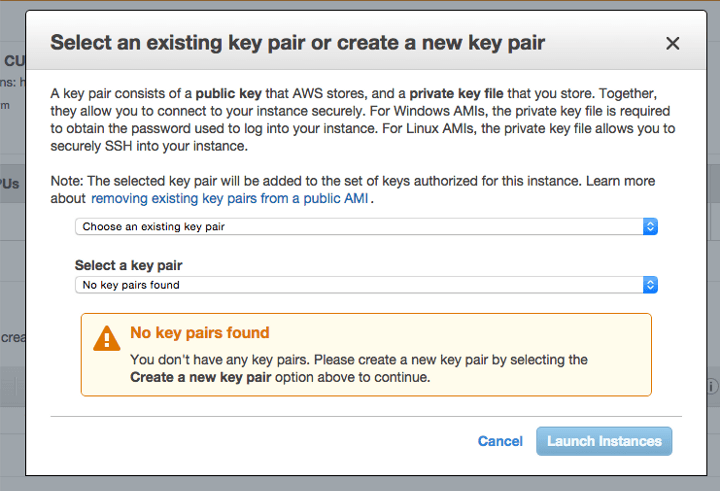
Bitcoin dollar exchange rate historical europe
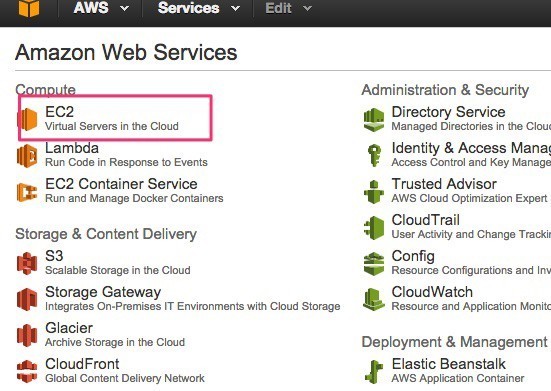
The answer is Amazon AWS! The registration process is integrated with Amazon. This is a good option for testing and getting familiar with the system before you deploy into paid services. Once you are signed in on AWS you will be presented with a list of services offered by Amazon.
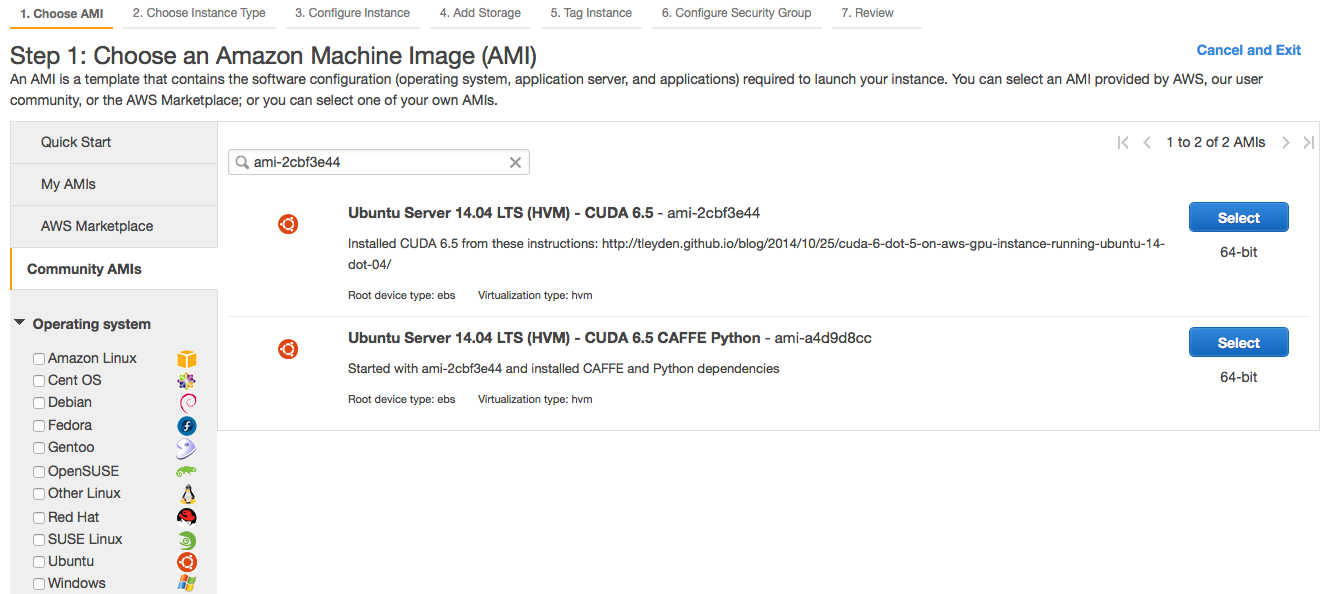
An Amazon Machine Image AMI provides the information required to launch an instance, which is a virtual server in the cloud. For this tutorial, we need to use the following AMI: Make always sure you are in the correct region US East, N.
Virginia as we said otherwise you will not see the AMI we are insterested in on the list. Now you can choose an Instance Type. Select GPU instances g2. WarningI recommend going with the smaller one first, or even stick to the t2. Leave the default settings, click Next: I added 60 Gigs on each volume.
The blockchain is growing so it is better to get more, this should give me suitable time to figure out how to migrate my data volumes with snapshots. After adding the storage click Next: Step 5 - Tag Instance Leave the default settings alone and click Next: After completing this final section, check the box and launch the instance. If you got everything completed you should get a launch status screen. Click view instances to proceed.
Click Connect, and your connection info will appear. What you will do is paste this connection string in your terminal to access the cloud server for installing Ethereum. Ethereum client comes in 3 implementations. However, the live testnet is running on the Go implementation! This will initiate the screen program so you can keep your processes running. Downloading the blockchain takes a long time, and you want to make sure your processes keep running after you get disconnected from them.
You have seen it a million times- Broken Pipe, then the panic sets in, where did it geth go, is it still running somewhere? Nope, why, because you need to have a container to hold the process, in this case it is called Screen. At first it may look intimidating, but it is very simple to use. Here is a link to a good resource that explains how to use it.
The image above shows an example of the blockchain just getting started. Once it shows it importing 1 block at a time you will be ready to start mining. Now start the miner screen ethminer -G --opencl-device 0 Then hit control-A control-D. If you're using the larger g2 instance with 4 GPUs the 2. One final note, if you would like to mine with a pool go over to miner gate. Then launch your ethminer like this:. That is it, now you should be able to see ethminer getting work packages from geth, and mining.
Please note this blog article is a work in progress I am creating as I follow the tutorial for mining Ether at https: At the time of posting this blog I am getting really close to getting my blocks all up to date. I will update this blog if there are any changes or if I run into any problems. If anyone has any comments, changes, and or suggestions please feel free to add comments below and I will get back to you and or update this post if needed.
My goal is to create an easy to follow guide for cloud mining ETC, with help from the community I know it can be done! I will clean this article up and add some more screenshots.
The tricky part is just having 2 screens open at same time, and also make sure you stop geth from the original blockchain download, and re-launch it with the rpc flag. Can we use digital ocean server for this? If i use 4gb ram ubuntu server of digital ocean for 1 month, how much i will earn etherium?
You can set it up and run it Digital Ocean for testing purposes, so that you know what you are doing when you step up to GPU. I don't know off hand any alts to mine right now with CPU's. For best results, I would look into something like mining Plotting Burstcoin, with hard drives.
Burst seems to be the most eco-friendly and quiet. I am a content-detection robot. This post is to help manual curators; I have NOT flagged you. Here is similar content: I cannot tell if you are the author, so ensure you have proper verification in your post or in a reply to me , for humans to check!
This is Strange, I cannot go back and edit. I had an issue connecting to the pool on miner gate, however I was able to join nano pool with this connection string if it helps anyone out there. No it is not not profitable, I would like to think it almost was for a brief instance in the very beginning, but then the miner kept sputtering out and AWS fees spiked!
Some huge data transfer fee estimate got me spooked so I had to shutdown the miner. Here is the screenshot: Good learning experience though. It shows estimates way too high for what I was getting out of it, luckily it was just estimates. In the end total ETC mined only. I was looking into this as well but It seems to be cheaper to run your own mining rig - thx for sharing! Step 8 - Connect To Your Instance Once you have launched your image you can monitor it and get your connection string here.
Install geth the Go-Ethereum command line client Run the following commands to install the latest developer version of go-ethereum sudo apt-get install software-properties-common sudo add-apt-repository -y ppa: Step 10 - Use geth to Download the Blockchain First things first, type the word screen in your terminal. Type the command below into your terminal. Please Note if you need to stop geth for any reason just press Ctrl C and it will terminate. Type these commands into your terminal to install ethminer.
As above type these commands into the terminal of your Amazon AWS cloud instance. To check if account generation was successful type the command: Then launch your ethminer like this: Authors get paid when people like you upvote their post. Which currency mining is best in vps server, i mean gives best results?? CPU mining is fine for testnets and internal projects. Hi - let me invite you to ethereum community based price estimation https: Nice coininstant Shot you an Upvote: